


Drag Mouse Over The Image To Zoom View.
Description
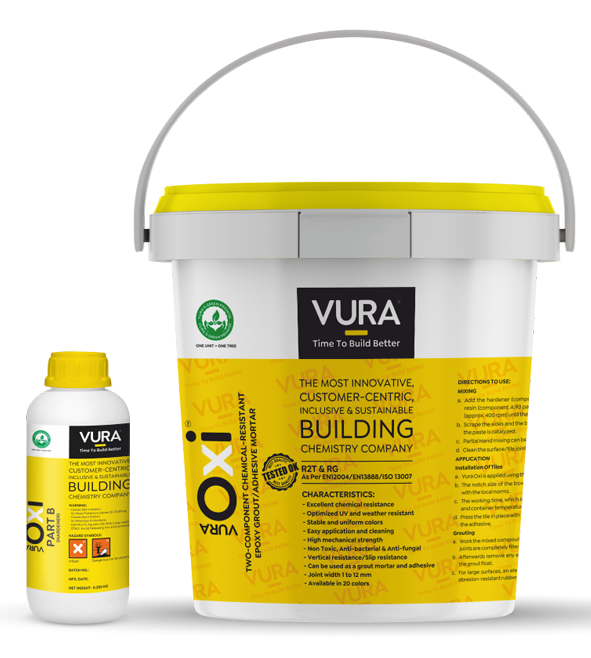
VURA Oxi
Two – component chemical-resistant epoxy mortar/grout for installation and grouting of tiles, mosaics and stones, where hygiene is of utmost importance such as bathrooms, kitchens, living room, bedroom, hospitals, laboratories, food & beverages industries, dairy industries, swimming pools, showrooms, airports and high traffic areas. It is chemical resistant joint filler and is available in 20 colors. VURA Oxi is classified as R2T & RG as per EN 12004/EN13888/ISO 13007

CHARACTERISTICS
- Indoor and Outdoor Use
- Optimized UV and weather resistant
- Stable and uniform colors for all types of tiles / stones
- Easy application and cleaning as cementitious grout mortar
- Excellent chemical resistance
- High mechanical strength
- Non Toxic, Anti-bacterial & Anti-Fungal
- Strong, Durable
- Ideal for waterproof grouting
- Vertical resistance/Slip resistance
- Can be used as a grout mortar and adhesive
- Joint width 1 to 12 mm
- Suitable for the contact with food
- Available in 20 colors
Documents & Downloads


Usage Guide
SUBSTRATE PREPARATION
Vura Oxi adheres to all sound, load-bearing, clean and dry substrates free of substances that may impair adhesion. Prior to grouting, the surface, thin-bed mortar or bedding mortar must have set sufficiently hard and all joints must be uniformly raked to the same depth and width.
APPLICATION
Vura Oxi consists of two components supplied in one container. Component A consists of an epoxy resin, mineral aggregates and additives. Component B consists of a mixture of organic catalysts.
MIXING RATIOS
Component A: 93 parts by weight
Component B: 7 parts by weight
The two parts are pre-batched in their respective containers
MIXING
Add the hardener (component B) contained in the plastic bottle to the resin (component A) and mix with a low speed electric drill and stirrer (approx. 400 rpm) until the mixture is completely free of lumps. Scrape the sides and the bottom of the container, using a steel spatula, to make sure that all the paste is catalyzed. Partial Hand mixing can be done. The two parts are prebatched in their packaging.
INSTALLATION OF TILES
Vura Oxi is applied using the thin-bed method. The notch size of the trowel must be adapted to the respective tile format in accordance with the local norms. The working time, which is identical with the correction time, is approx. 45 minutes at room and container temperatures of +23 °C.
GROUTING
Work the mixed compound with an epoxy grout float into the clean, dry joints. Make sure the joints are completely filled without any voids.
Afterwards remove any excess material by skimming it diagonally off the tile surface with the grout float. For large surfaces, an electric single-brush floor maintenance machine equipped with an abrasion-resistant rubber scraper can be used.
CLEANING AND FINISHING
The grout work must be cleaned and finished while the product is still wet and in any case in the shortest possible time. Take care to not remove product from the joints or leave stains on the tile/stone surface. Cleaning and finishing can be performed either manually or using an electric single-brush machine equipped with a felt disc
Description
VURA Oxi
Two – component chemical-resistant epoxy mortar/grout for installation and grouting of tiles, mosaics and stones, where hygiene is of utmost importance such as bathrooms, kitchens, living room, bedroom, hospitals, laboratories, food & beverages industries, dairy industries, swimming pools, showrooms, airports and high traffic areas. It is chemical resistant joint filler and is available in 20 colors. VURA Oxi is classified as R2T & RG as per EN 12004/EN13888/ISO 13007
CHARACTERISTICS
- Indoor and Outdoor Use
- Optimized UV and weather resistant
- Stable and uniform colors for all types of tiles / stones
- Easy application and cleaning as cementitious grout mortar
- Excellent chemical resistance
- High mechanical strength
- Non Toxic, Anti-bacterial & Anti-Fungal
- Strong, Durable
- Ideal for waterproof grouting
- Vertical resistance/Slip resistance
- Can be used as a grout mortar and adhesive
- Joint width 1 to 12 mm
- Suitable for the contact with food
- Available in 20 colors
Usage Guide
SUBSTRATE PREPARATION
Vura Oxi adheres to all sound, load-bearing, clean and dry substrates free of substances that may impair adhesion. Prior to grouting, the surface, thin-bed mortar or bedding mortar must have set sufficiently hard and all joints must be uniformly raked to the same depth and width.
APPLICATION
Vura Oxi consists of two components supplied in one container. Component A consists of an epoxy resin, mineral aggregates and additives. Component B consists of a mixture of organic catalysts.
MIXING RATIOS
Component A: 93 parts by weight
Component B: 7 parts by weight
The two parts are pre-batched in their respective containers
MIXING
Add the hardener (component B) contained in the plastic bottle to the resin (component A) and mix with a low speed electric drill and stirrer (approx. 400 rpm) until the mixture is completely free of lumps. Scrape the sides and the bottom of the container, using a steel spatula, to make sure that all the paste is catalyzed. Partial Hand mixing can be done. The two parts are prebatched in their packaging.
INSTALLATION OF TILES
Vura Oxi is applied using the thin-bed method. The notch size of the trowel must be adapted to the respective tile format in accordance with the local norms. The working time, which is identical with the correction time, is approx. 45 minutes at room and container temperatures of +23 °C.
GROUTING
Work the mixed compound with an epoxy grout float into the clean, dry joints. Make sure the joints are completely filled without any voids.
Afterwards remove any excess material by skimming it diagonally off the tile surface with the grout float. For large surfaces, an electric single-brush floor maintenance machine equipped with an abrasion-resistant rubber scraper can be used.
CLEANING AND FINISHING
The grout work must be cleaned and finished while the product is still wet and in any case in the shortest possible time. Take care to not remove product from the joints or leave stains on the tile/stone surface. Cleaning and finishing can be performed either manually or using an electric single-brush machine equipped with a felt disc
